I have a long term goal of providing enough food on our homestead to last from one harvest to the next, and hopefully, a little more. I have been discovering that I am not planting enough or early enough to meet this goal. So we decided it was time to figure out how to build a greenhouse. We were able to salvage most of our building materials to keep the price at or below $400. Our greenhouse measures 10×16 feet, so we have plenty of room inside. I took lots of photos so I can walk you through how we built our greenhouse.
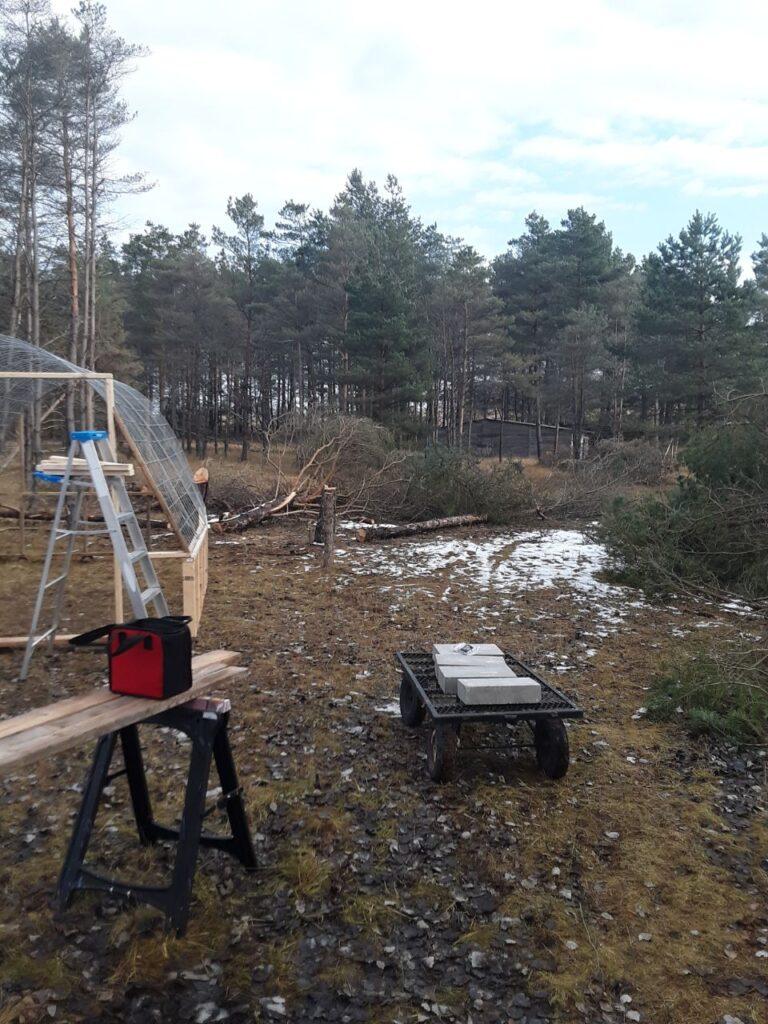
The first thing we had to do was find a good location. Greenhouses need plenty of sun throughout the day to do their job properly. We have a lot of old and dying trees on our property, so we decided to make room by cutting down quite a few trees. We spent some time out in the area where we wanted to build to make sure the sun would hit it most of the day. We also played around with the angle of the greenhouse to get the majority of the long side facing south.
Some of those trees were a real challenge, with Doug pushing on one side with the tractor bucket, and several of us pulling on the other side with a rope. But it all fell down cleanly and safely.
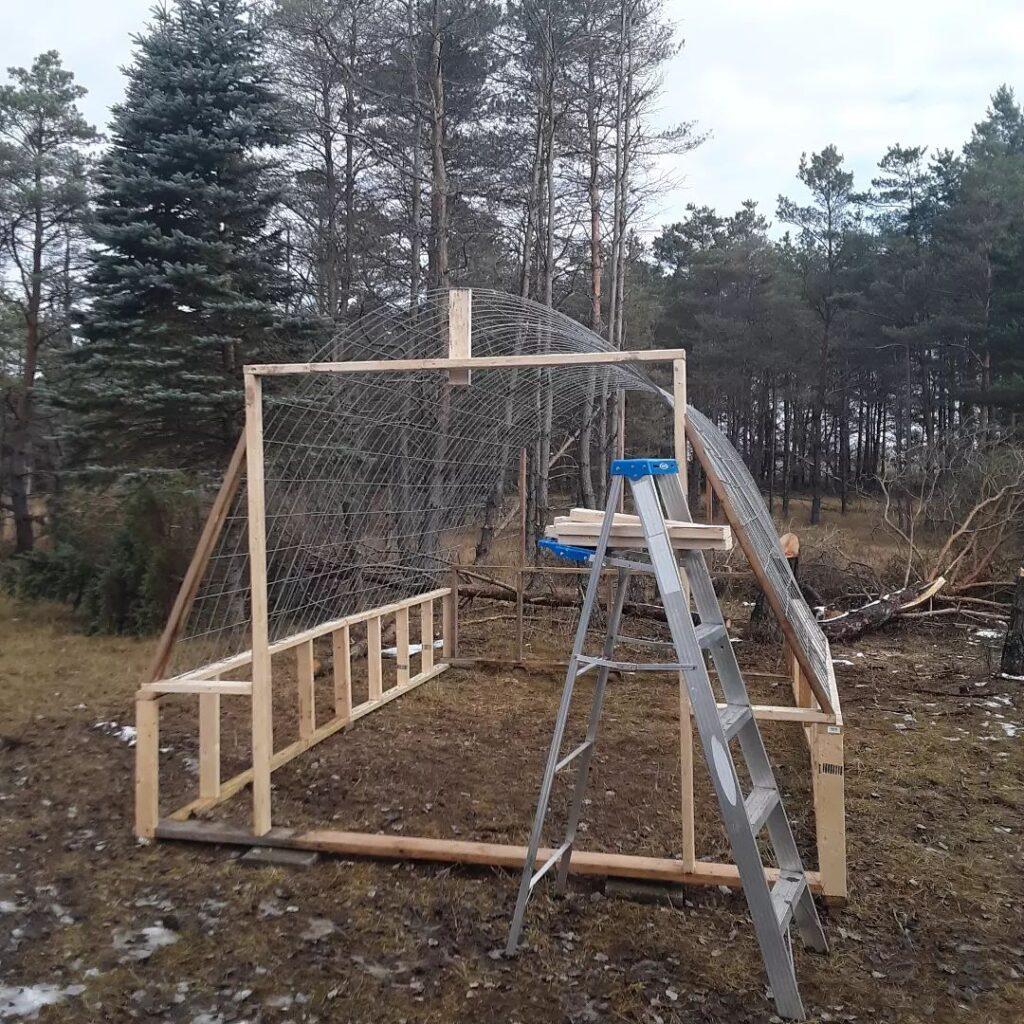
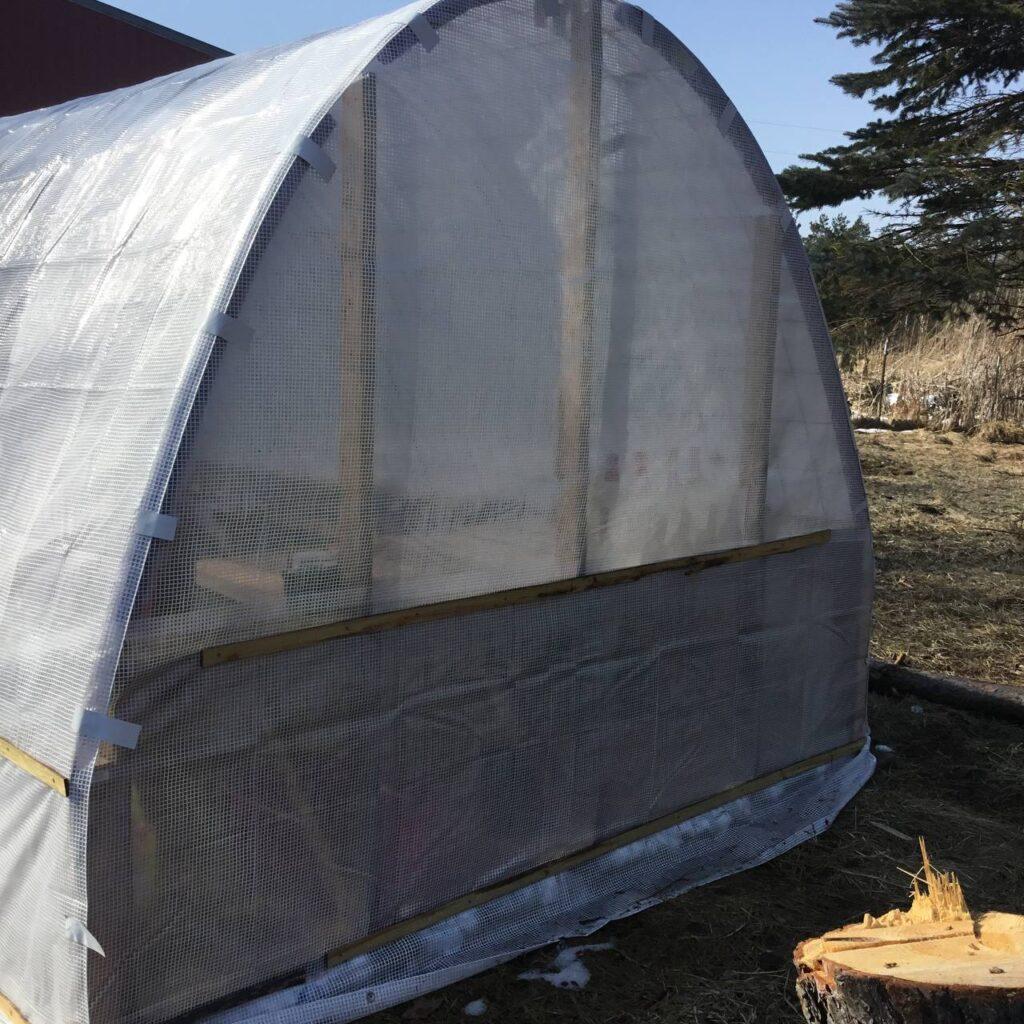
We decided to build a hoop style greenhouse. My chicken coop was built this way, so we knew we could put it together quickly. We built the greenhouse in late November, so time was of the essence. We built 2 foot high walls. Some of the wood was salvaged from the lumber we saved when we took down the kids’ tree house. We did have to buy some 2x4s and some pressure treated wood just for where it would touch the ground. We also bought 4 cattle panels. We accidentally discovered a way to support the roof. We overlapped the panels to fit them in the 16 foot length, and that kept the roof from collapsing during a heavy snowfall. My chicken coop roof was not overlapped and it was damaged badly in the same storm.
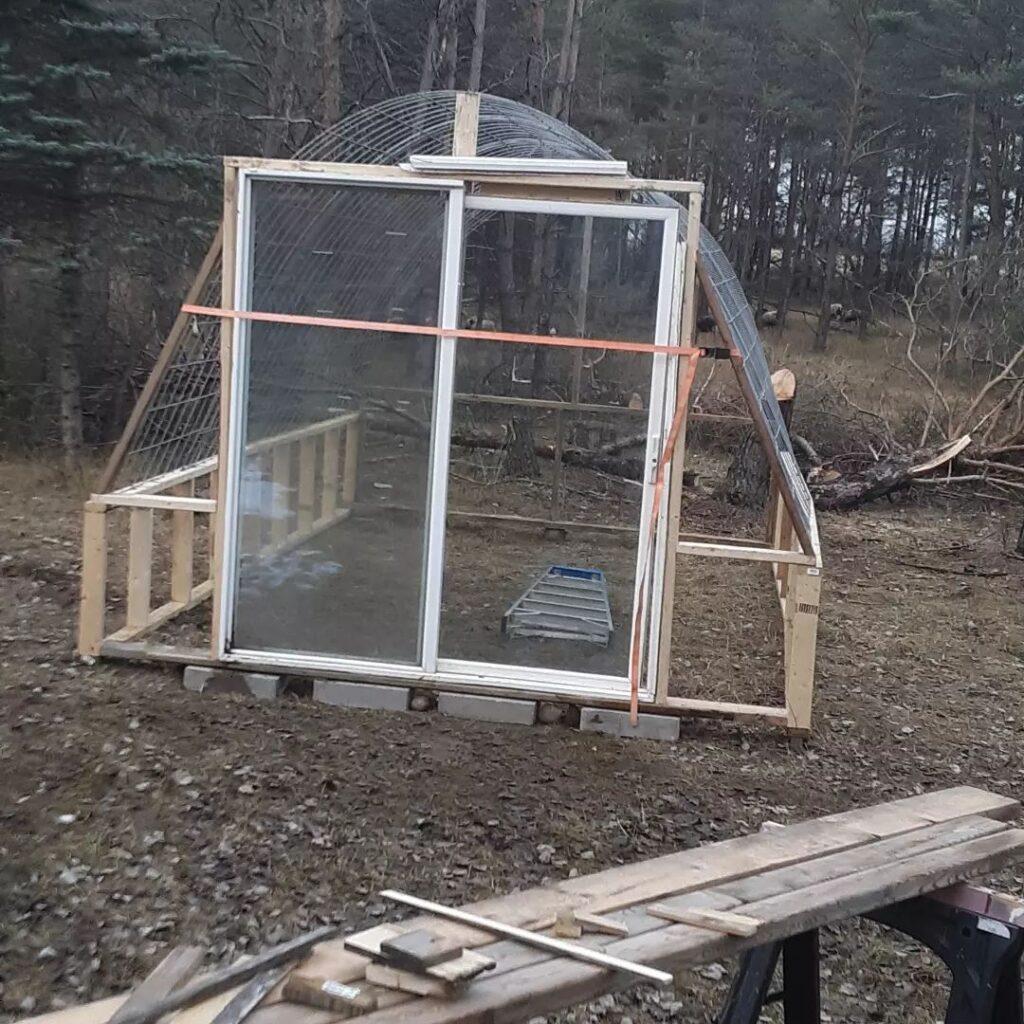
My favorite salvaged item in our greenhouse is the sliding door. It used to be the back door of our house, but was in pretty bad shape, so we finally upgraded it. Doug had to literally cut it in pieces to get it out of the opening. We hoped to have some use for it in the future, so we strapped it to the back porch for safe keeping. Well, look at how nicely it works in my greenhouse!
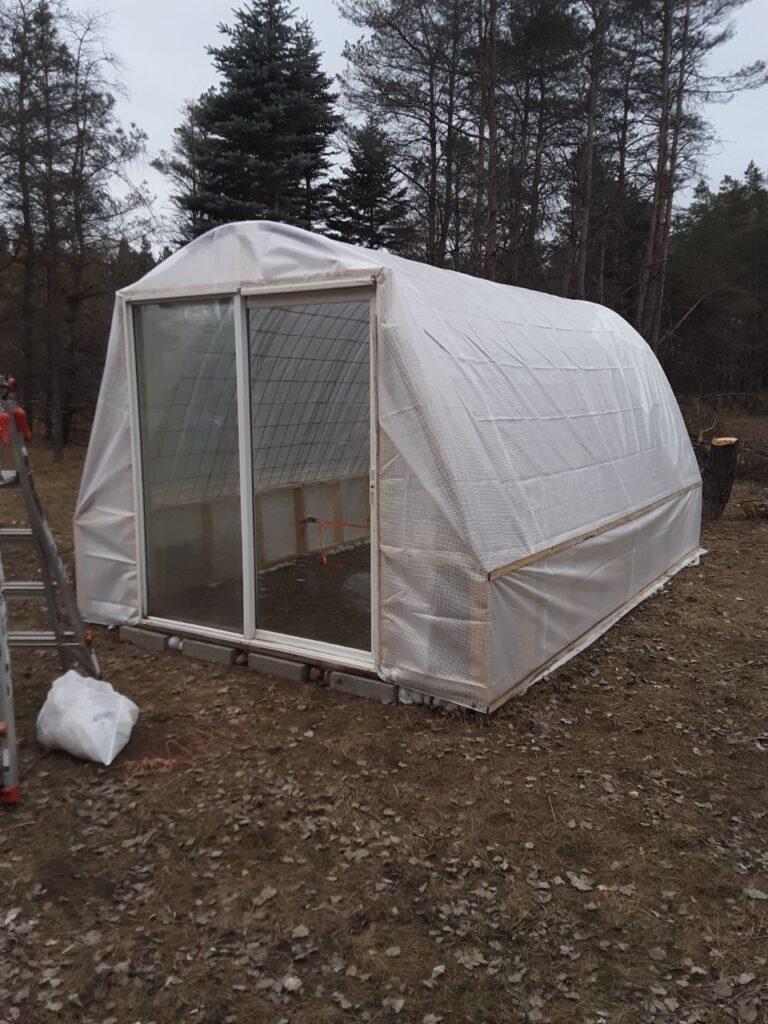
The material we spent the most on was the greenhouse plastic. I did not want to buy 4-6 mil clear plastic and have to replace it every year or two. We spent more to get clear greenhouse tarps and they feel much more durable than just clear plastic. Tip: overestimate the size you will need. I thought I had overestimated and it still barely reached in some directions. Before we put the plastic on, I slit some pool noodles and put them over the cattle panels to protect the greenhouse plastic from tears. You can see my purple pool noodles in some of the inside photos below.
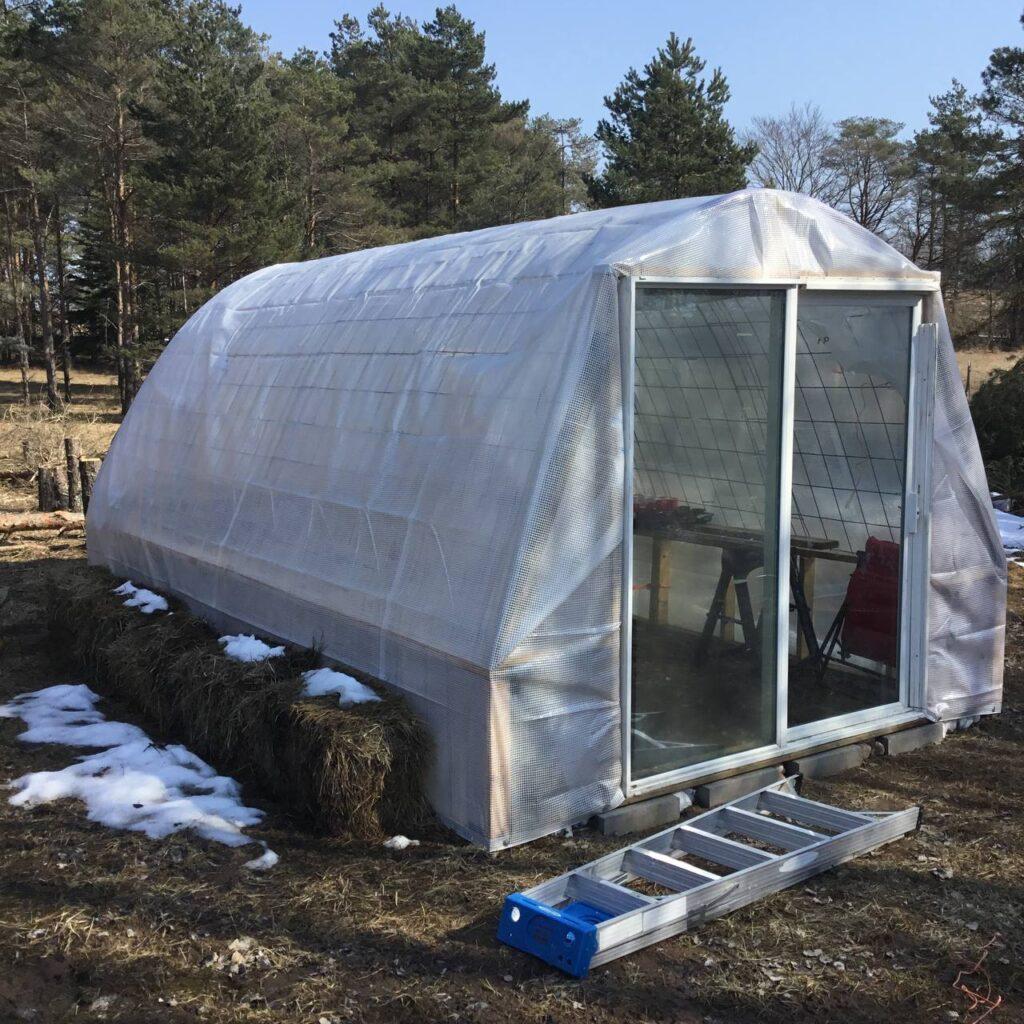
Here is the outside all finished. We used patio stones and bricks to level it as you can see along the front wall. I put some hay bales along one side, not sure if it did anything or not.
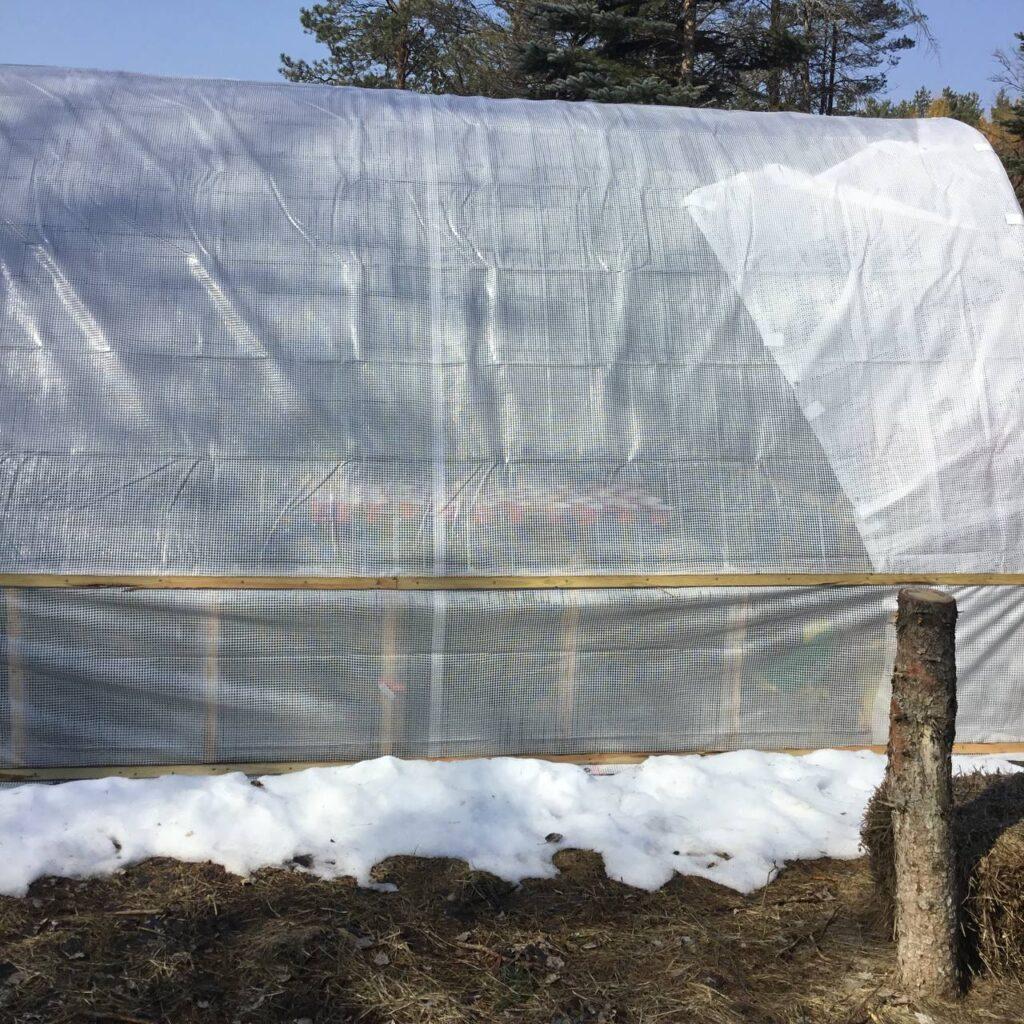
Doug ripped some boards to give us these skinny strips. He screwed right through the plastic to the inside wall. This helped keep the plastic nice and tight.
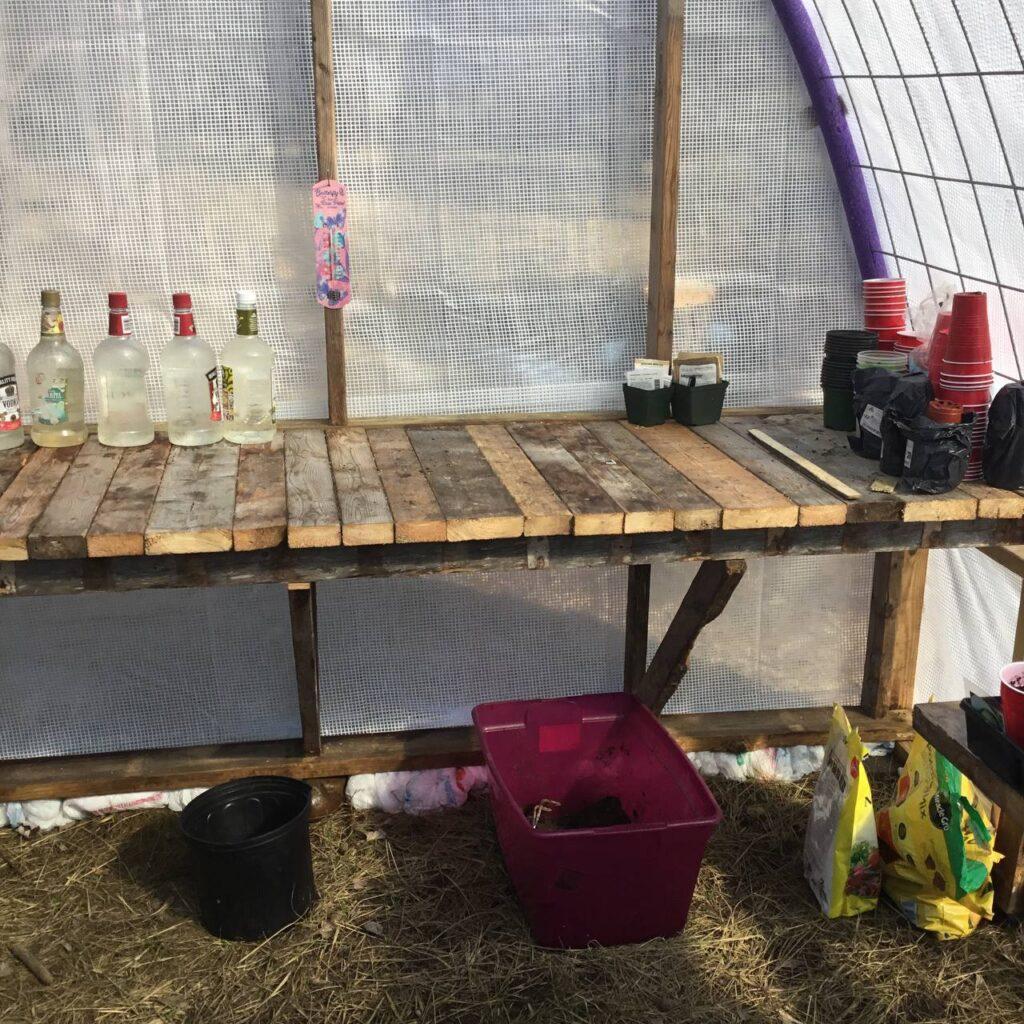
Doug built a work counter along the back wall out of more salvaged boards from the old tree house. I love the rustic look it gives. If you look at the bottom of the wall, you will see all the recycled plastic bags we shoved in there to keep the heat in and the cold out. We won’t be using the greenhouse once the weather is hotter, so we weren’t as considered about venting underneath. If we need air, we will put a screen in the doorway.
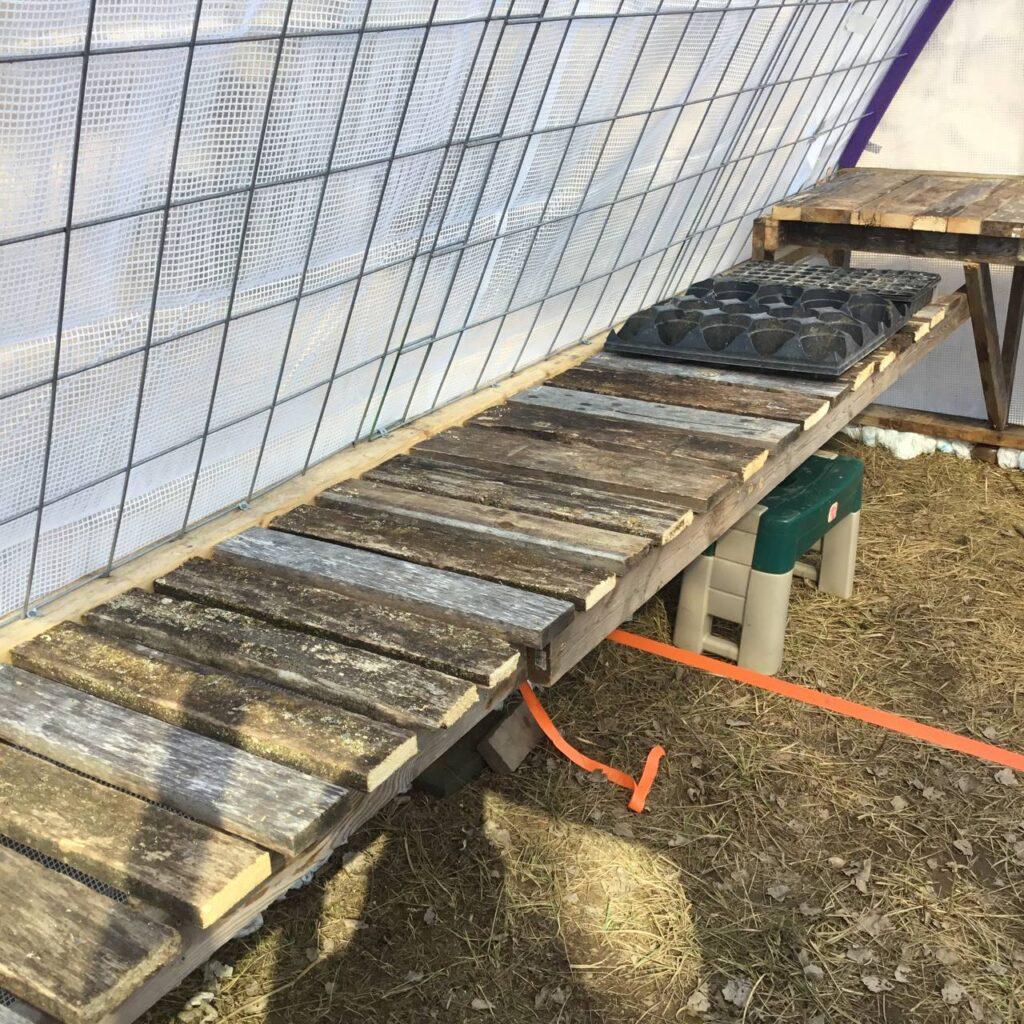
This counter is 13 feet long and runs down one side. He spaced the boards on this long shelf about 1 inch apart. This will allow extra water to run off when we water the plants. The boards are 2 feet long, so the counter easily holds the black trays from commercial greenhouses. I’ve been randomly saving them for years. The orange strap was a temporary measure while we were building, and we just haven’t removed it yet.
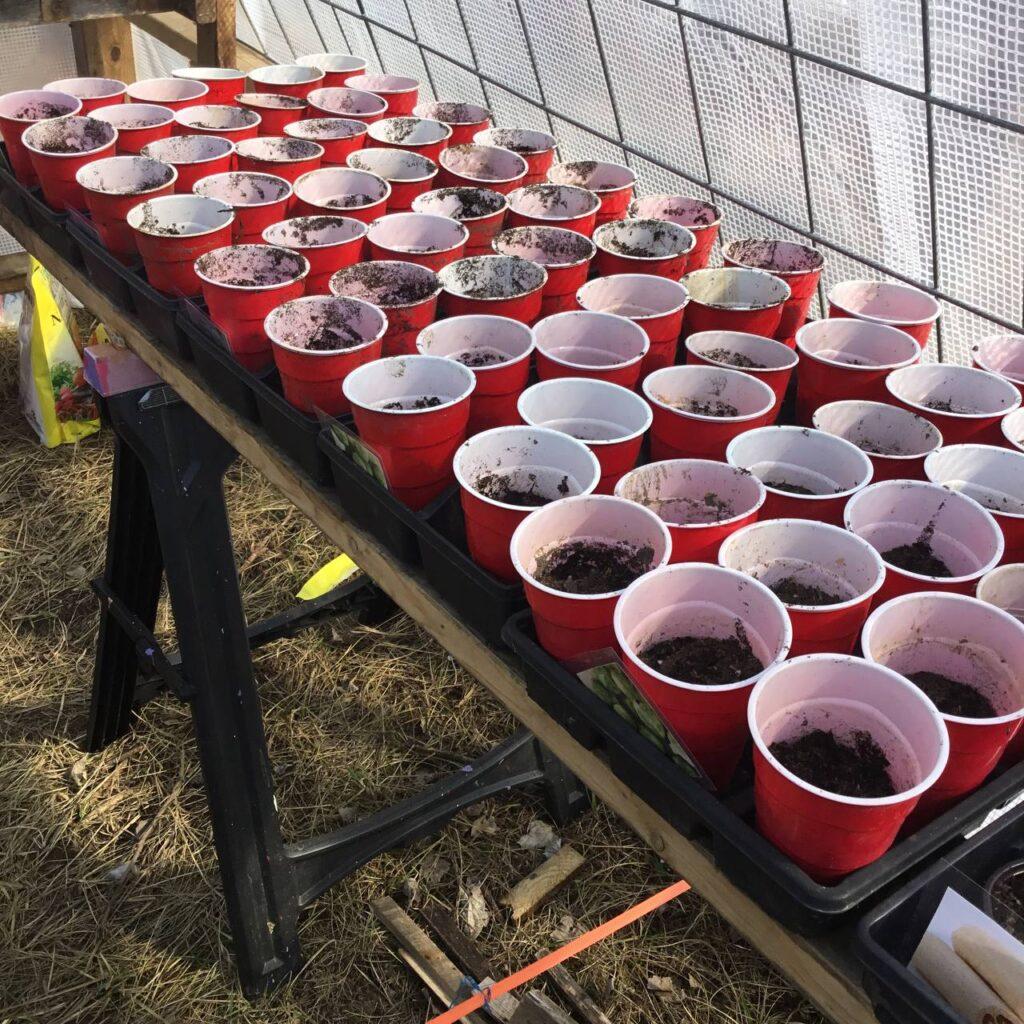
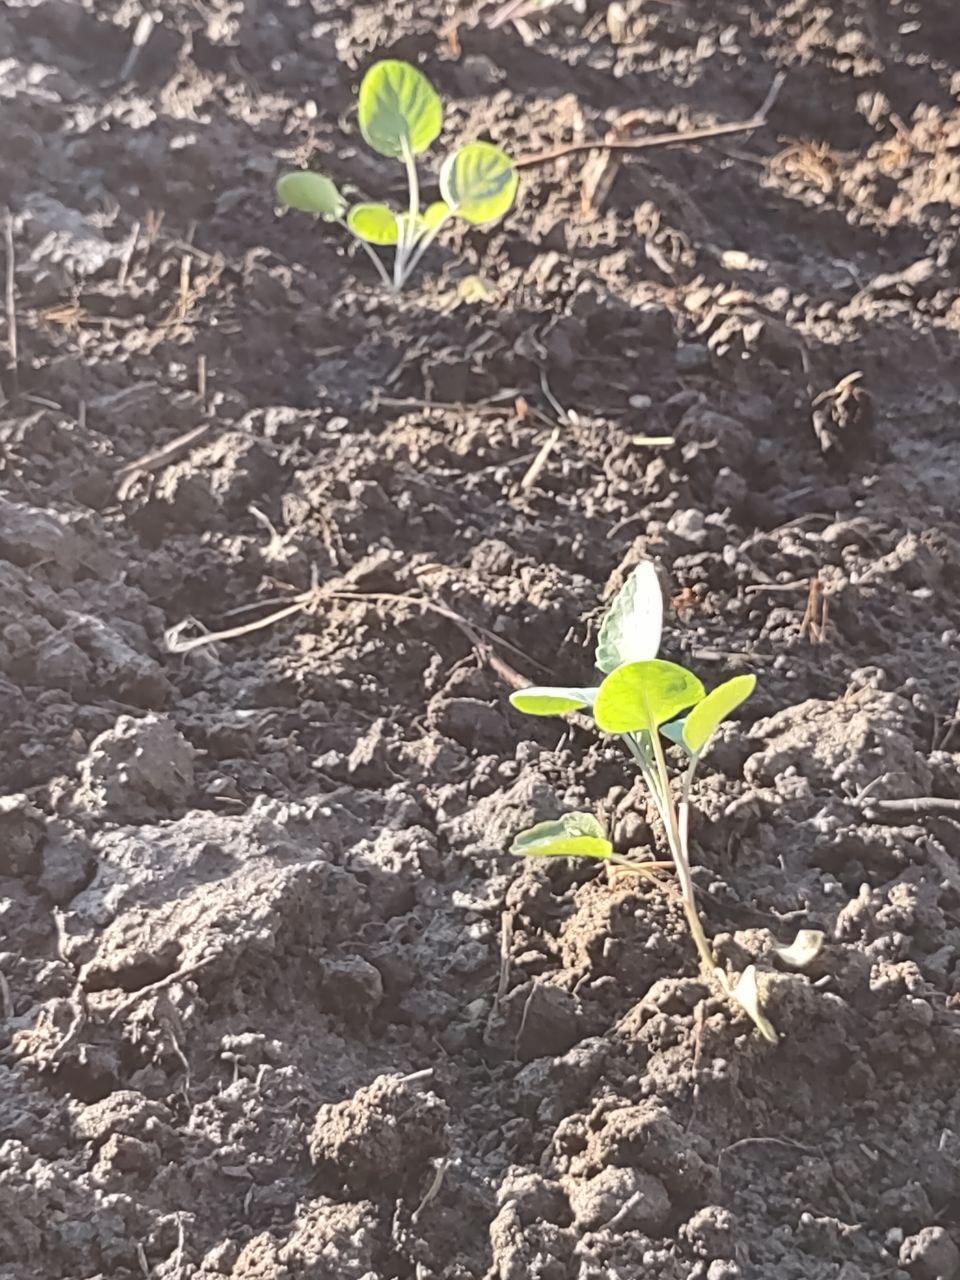
We haven’t built the other long counter yet, so sawhorses and a few long boards will work just fine. These cups are full of brassica seeds, which can sprout in much lower temperatures.
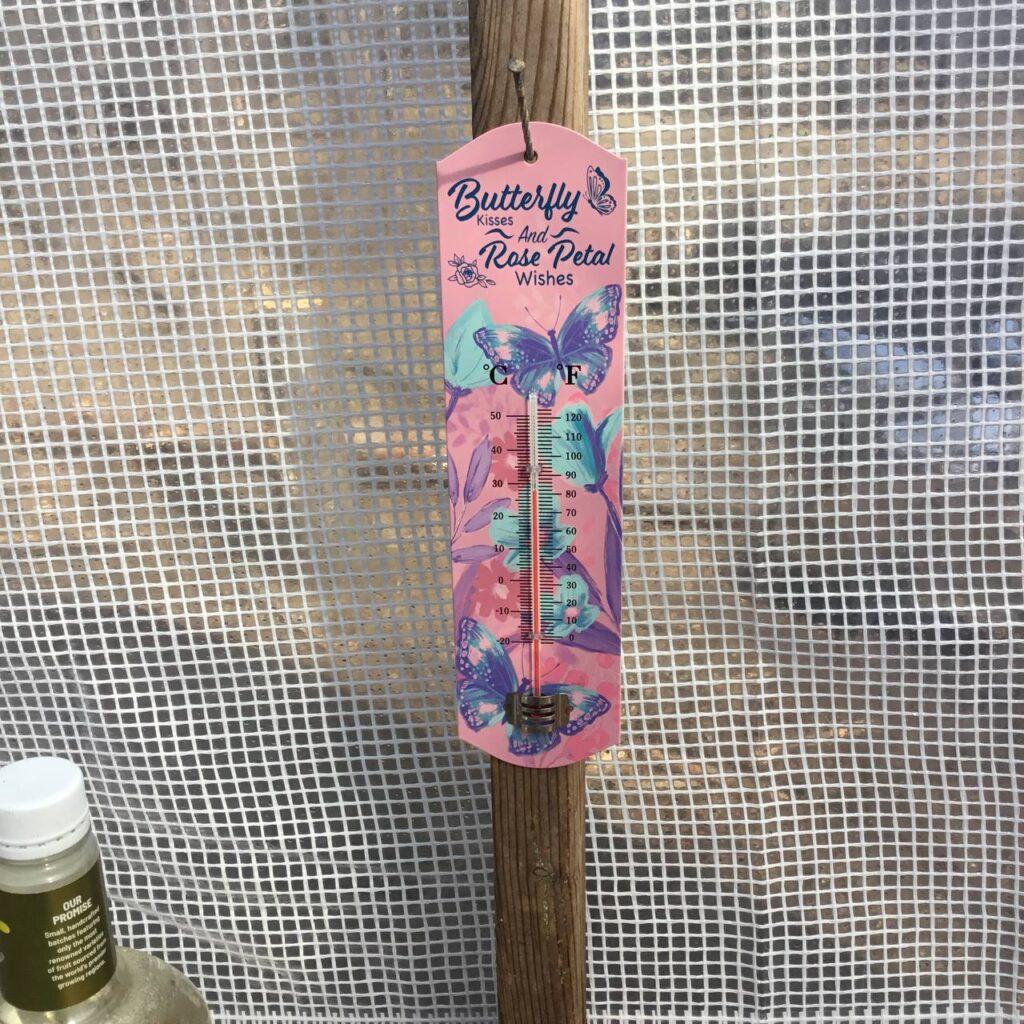
It was about 70 degrees outside today, and the greenhouse topped 80, not bad for the end of February. I am so excited to see how this tool helps us to produce more food for our family. Our latest tool for preserving our food is a freeze dryer, which you can learn more about here. (affiliate link) I hope this post will help you figure out you can creatively build a greenhouse as well. A fancy prefab greenhouse is not required to help you provide food for your family.
Be sure to follow along on our homesteading and Torah keeping journey by joining our email group below. We have lots of free goodies for our subscribers.